Outdoor Decor
DIY Fire Pit Ideas: Design and Safety Tips

There’s something magical about gathering around a backyard fire pit, toasting marshmallows, swapping stories, and feeling that cozy glow. If you’ve been dreaming about building one without breaking the bank, you’re in the right place.
These DIY fire pit ideas make it super simple (and surprisingly quick) to create your own backyard oasis, and you’ll be toasting s’mores in no time.
Let’s get started, step-by-step.
What You Might Need
- 20–30 retaining wall stones (depending on size)
- 1 bag of pebbles (about 0.5 cubic feet)
- 1 bag of sand (about 0.5 cubic feet)
- 1 bag of red lava rock (optional)
- Shovel
- Level
- Container to carry dirt
- Piece of wood for leveling
- Hammer or tamper
- Landscape adhesive (optional but recommended)
As an Amazon Associate, I earn from qualifying purchases. Some of the links in this article are affiliate links. This means that, at zero cost to you, I will earn an affiliate commission if you click through the link and finalize a purchase.
Important:
- Always check your local fire codes and regulations before you dig.
- Keep your fire pit at least 10–20 feet away from your house and any structures.
Step 1: Site Preparation
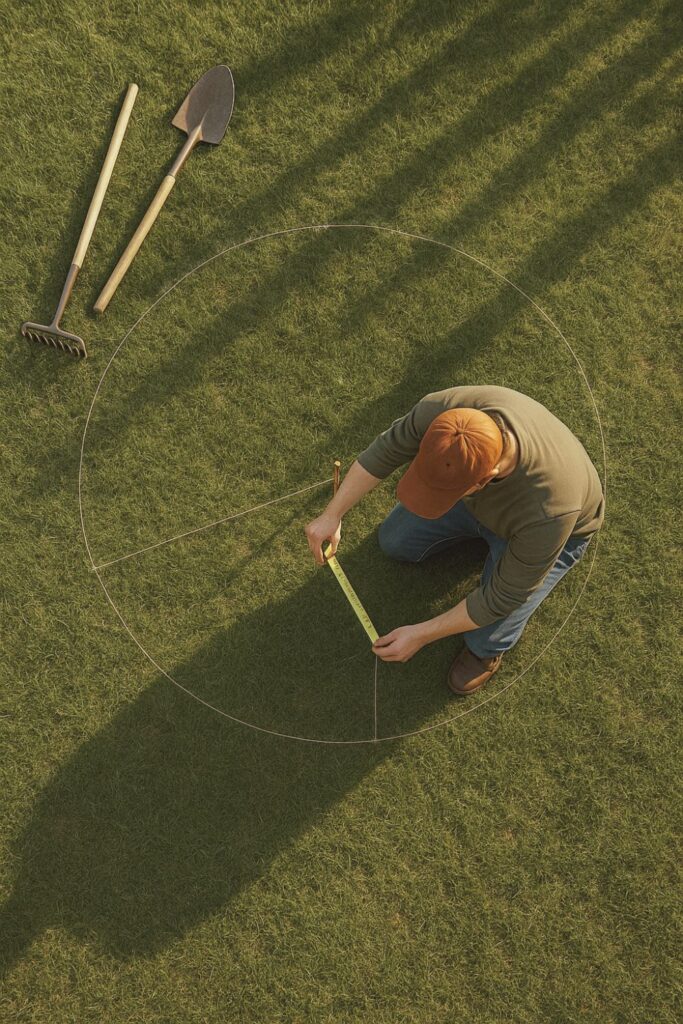
First things first and that’s to pick your perfect spot. Look for a flat, open area that’s safely away from trees, fences, and anything flammable.
Set your retaining wall stones in a circle where you want the fire pit. Use a shovel to trace around them, then remove the stones and dig out about 2–3 inches of soil and grass inside the marked circle.
Use a piece of wood to check for any uneven spots and tamp down the dirt so you’ve got a solid, level base.
Step 2: Base Preparation
Next, sprinkle a layer of sand into the cleared circle. About an inch or so will do the trick. Spread it evenly using your hands or a board. A level base now makes everything easier later!
Step 3: First Level Installation
Time to start stacking. Lay your first ring of stones directly on top of the sand, adjusting each stone to sit nice and flat.
Use a level (or just a good eye) and tap stones gently with a hammer or wood block to make tiny adjustments.
You’re building the foundation for a sturdy, safe fire pit, so take your time here.
Step 4: Second Level Installation
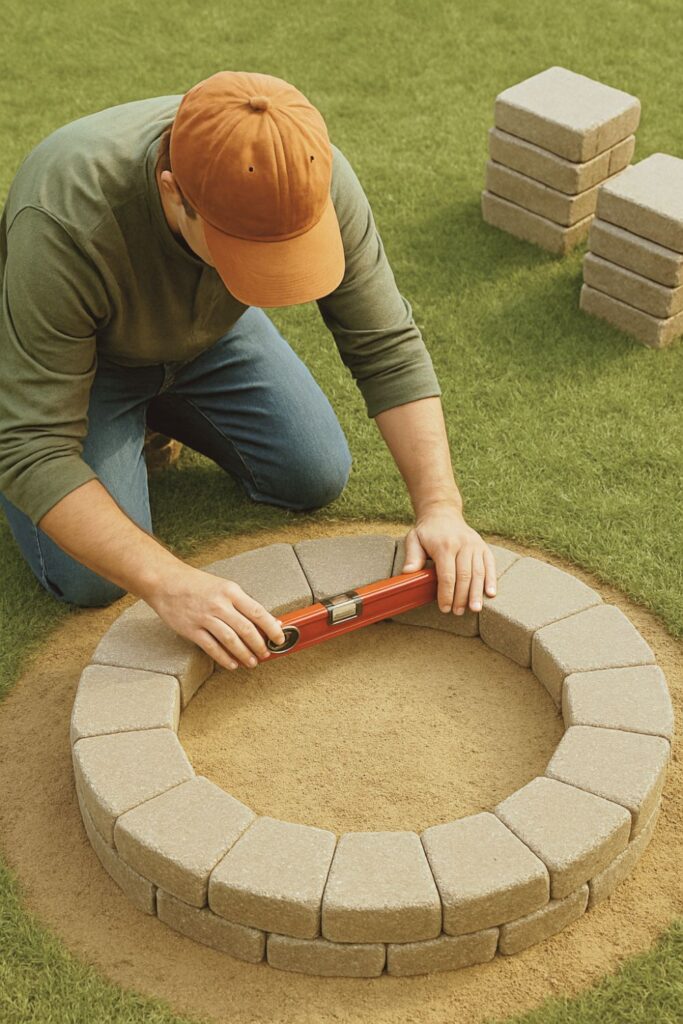
Place the second row of stones, making sure each new stone sits over the seam between two stones underneath. (Just like brickwork!) This helps lock everything in place.
You can add landscape adhesive between layers if you want extra durability — especially if kids, dogs, or wild backyard games are in your future.
Step 5: Third Level Installation (Optional)
If you want a taller fire pit, go for a third layer. Again, bridge the seams for strength and apply adhesive if desired.
If you’re happy with just two tiers, you can skip straight to finishing touches.
Step 6: Finishing Touches
Pour a layer of pebbles into the center of the fire pit — this helps with drainage and looks super polished.
If you want an even cozier vibe, sprinkle a layer of red lava rocks on top. Instant fire pit magic.
Level everything out nicely so the surface looks neat and inviting.
Step 7: Final Inspection
Before lighting that first fire, do a quick safety check:
- Make sure all stones are snug and level.
- Double-check your distance from any buildings or trees.
- Keep a hose or fire extinguisher handy, just in case.
Step back, admire your work and start planning that backyard s’mores night.

Picture This
The sky’s painted in shades of pink and gold, and your brand-new DIY fire pit crackles happily in the twilight. Friends gather around on cozy chairs, roasting marshmallows and sharing laughs as the flames flicker warmly. A gentle breeze stirs the scent of woodsmoke, and for a moment, everything feels just a little bit magical.
Best of all?
You built this backyard memory-maker with your own two hands and you didn’t have to call a contractor to do it.