Outdoor Decor
Bloom Bar Ideas: Create a Stunning Backyard Flower Station
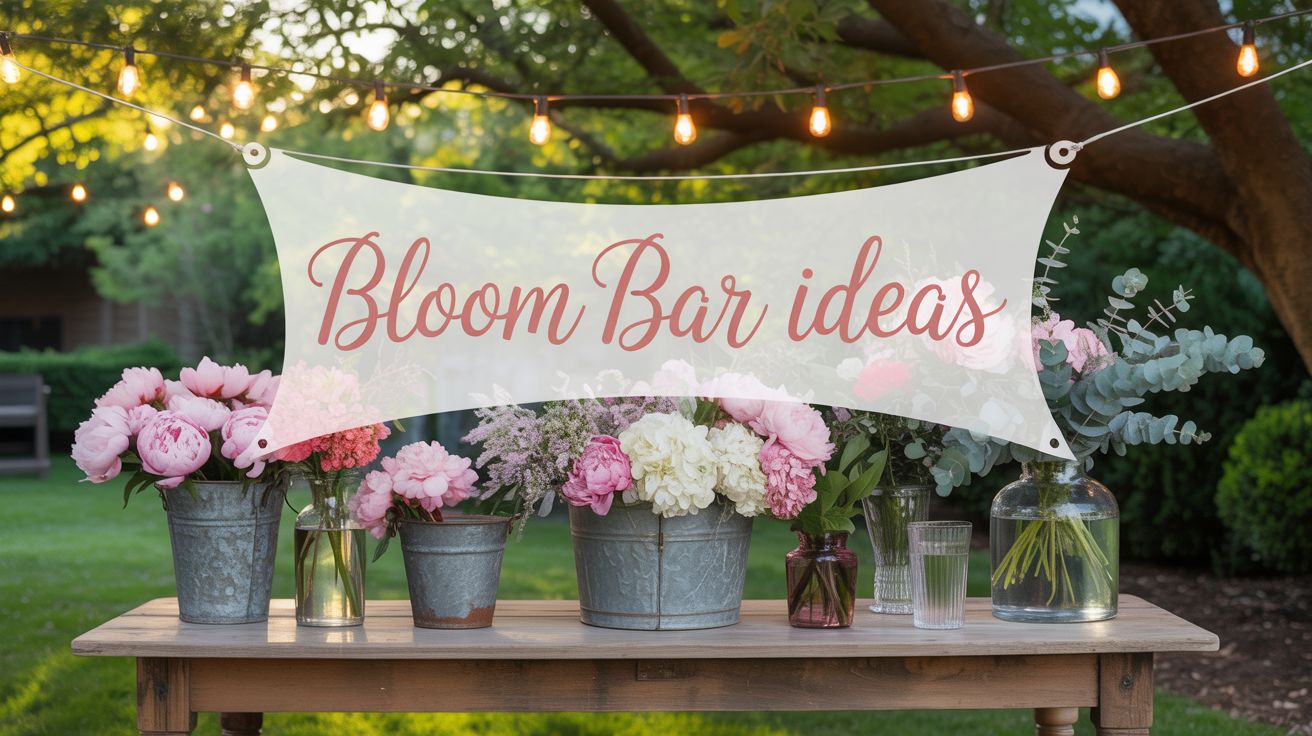
Your backyard has so much potential, and a bloom bar might be the most delightful way to use it.
Picture this: a beautifully styled table overflowing with fresh flowers, vases in all shapes and sizes, and your guests creating their own custom arrangements to take home. It’s interactive, it’s gorgeous, and it’s way easier to pull off than you might think.
Whether you’re hosting a bridal shower, birthday party, or just a casual weekend gathering with friends, bloom bar ideas can completely transform the vibe.
As an Amazon Associate, I earn from qualifying purchases. Some of the links in this article are affiliate links. This means that, at zero cost to you, I will earn an affiliate commission if you click through the link and finalize a purchase.
There’s something magical about giving people the chance to get hands-on with flowers. Plus, they leave with a bouquet they made themselves, which is basically the best party favor ever.
I’m going to walk you through everything you need to know to create a backyard bloom bar that looks like it came straight out of a magazine.
We’re talking setup, styling, flower choices, and all those little details that make it feel special.
Choose the Perfect Spot in Your Backyard
The location sets the entire tone for your bloom bar. You want a spot that feels inviting and has enough space for people to move around comfortably without bumping elbows.
A shaded area under a tree is ideal because it keeps flowers fresh longer and guests comfortable. If you don’t have natural shade, a patio with an umbrella or a covered porch works beautifully.
Think about the backdrop too. A garden wall, a wooden fence, or even a simple hedge creates a pretty setting for photos. Your guests will absolutely want to snap pictures of their creations, so give them something lovely to stand in front of.
How to Style It:
- Position your table where it gets dappled sunlight rather than harsh afternoon rays.
- Use the natural landscape as your backdrop instead of adding extra decorations.
- Make sure there’s enough room for 3-4 people to work at the table simultaneously.
- Keep the bloom bar close to a water source if possible for easy refills.
Set Up a Rustic Wooden Table as Your Base
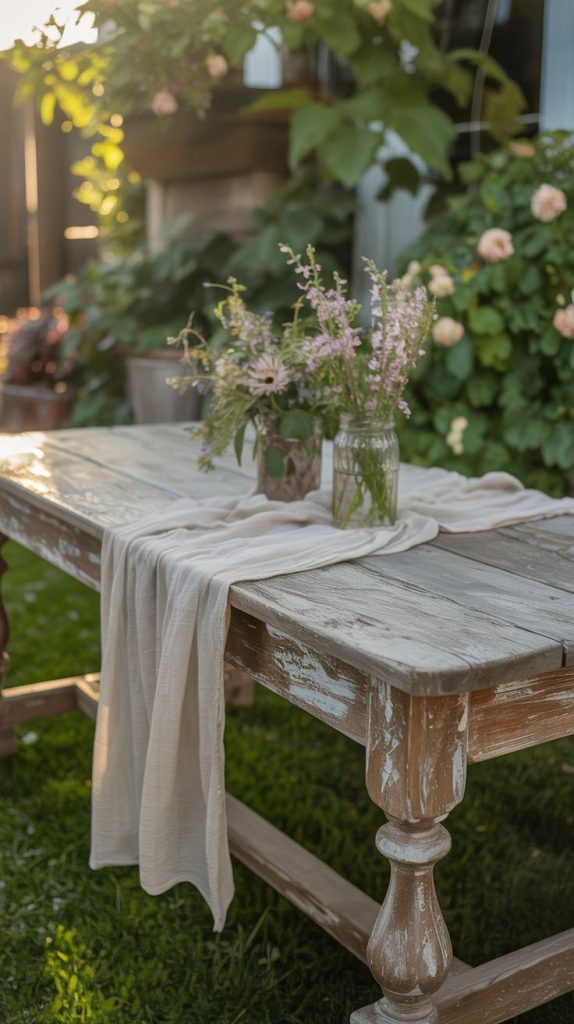
A sturdy wooden table is the foundation of any great bloom bar. Farmhouse tables, picnic tables, or even a repurposed door laid across sawhorses all work perfectly. The beauty of a bloom bar is that it doesn’t need to be fancy. In fact, a weathered wood surface adds so much character and charm.
The key is making sure your table is at a comfortable working height and long enough to spread out all your supplies. Six feet is a good length for a medium-sized gathering, but you can go bigger or smaller depending on your guest count.
How to Style It:
- Drape a simple linen runner down the center, letting the wood show on both sides.
- Skip the tablecloth completely and let the natural wood be the star.
- Add a vintage crate or two underneath for extra visual interest and storage.
- Position the table perpendicular to your seating area so it becomes a focal point.
Stock Up on Fresh Seasonal Blooms
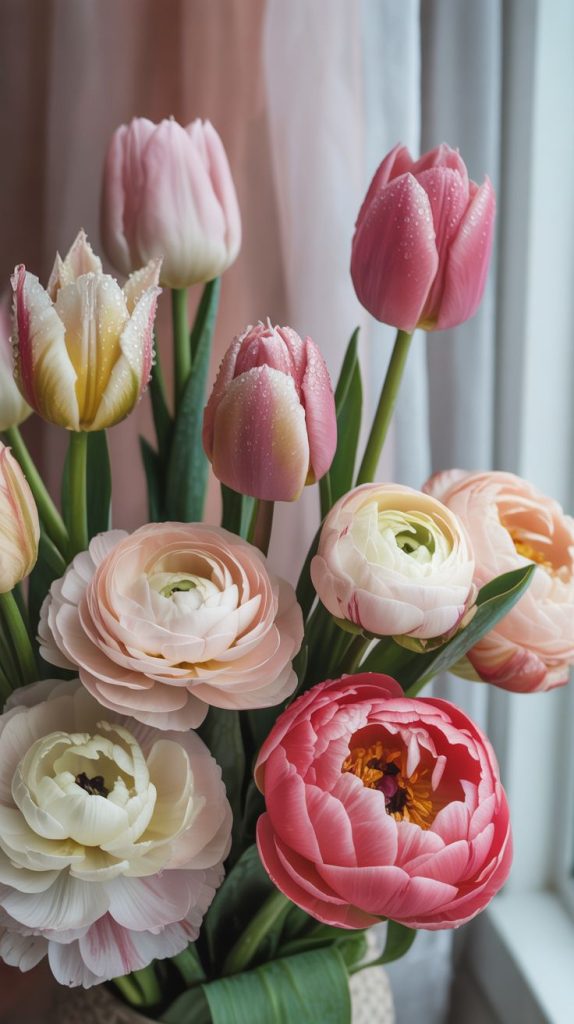
The flowers are obviously the main event, and choosing the right ones makes all the difference. Seasonal blooms not only look better, but they’re also more affordable and last longer.
Spring calls for tulips, ranunculus, and peonies. Summer is all about sunflowers, zinnias, and dahlias. Fall brings mums, marigolds, and asters.
Variety is your friend here. Mix different colors, sizes, and textures so your guests have plenty of options to play with. I usually aim for 5-7 types of flowers in complementary colors, plus plenty of greenery for filler.
How to Style It:
- Group flowers by type in galvanized buckets or mason jars for easy selection.
- Include at least two types of greenery like eucalyptus, ferns, or ivy.
- Add a few statement blooms like hydrangeas or garden roses for drama.
- Pre-cut stems to varying lengths so guests can grab and go.
Shop It: This Mason Jar Flower Vases set gives you 12 jars to work with, so you can create a gorgeous clustered look or spread them across your bloom bar for that collected, farmhouse vibe. They’re perfect for displaying individual flower types so guests can easily grab what they want.
Display Flowers in Galvanized Buckets and Vintage Vessels
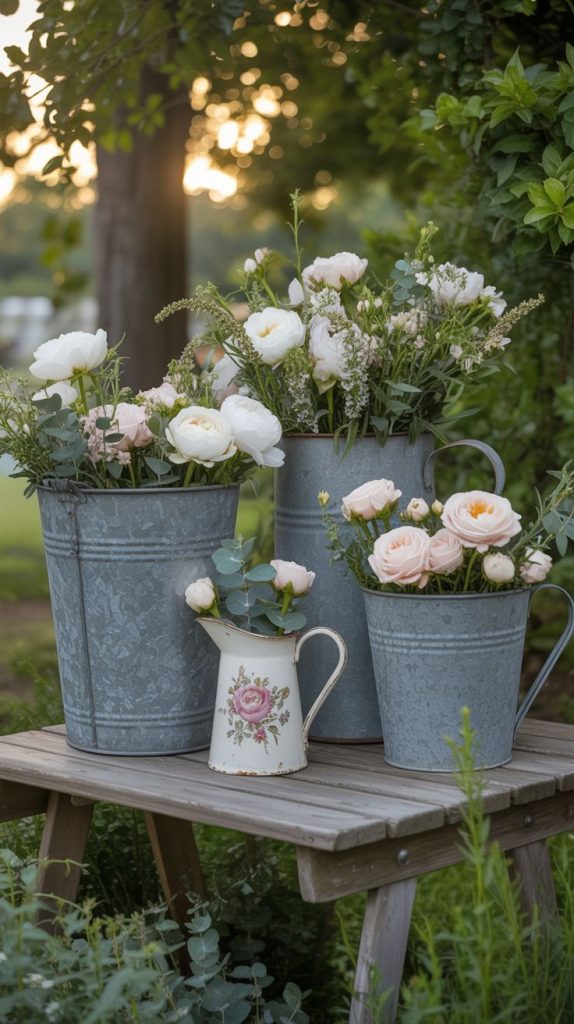
How you display the flowers matters almost as much as the flowers themselves. Galvanized metal buckets give that perfect farmhouse-meets-garden-party vibe, and they’re practical because they hold a lot of water.
But don’t stop there. Vintage pitchers, ceramic crocks, and even old watering cans add layers of charm and visual interest.
The mix-and-match approach looks intentional and collected rather than matchy-matchy. Hit up thrift stores, flea markets, or your own garage for containers. You’d be surprised what works.
How to Style It:
- Vary the heights of your containers by placing some on stacked books or wooden crates.
- Fill each vessel about two-thirds full with water before adding flowers.
- Label each flower type with small kraft paper tags if you want to get fancy.
- Cluster similar-colored blooms together for a cohesive but abundant look.
Provide an Assortment of Vases for Guest Arrangements
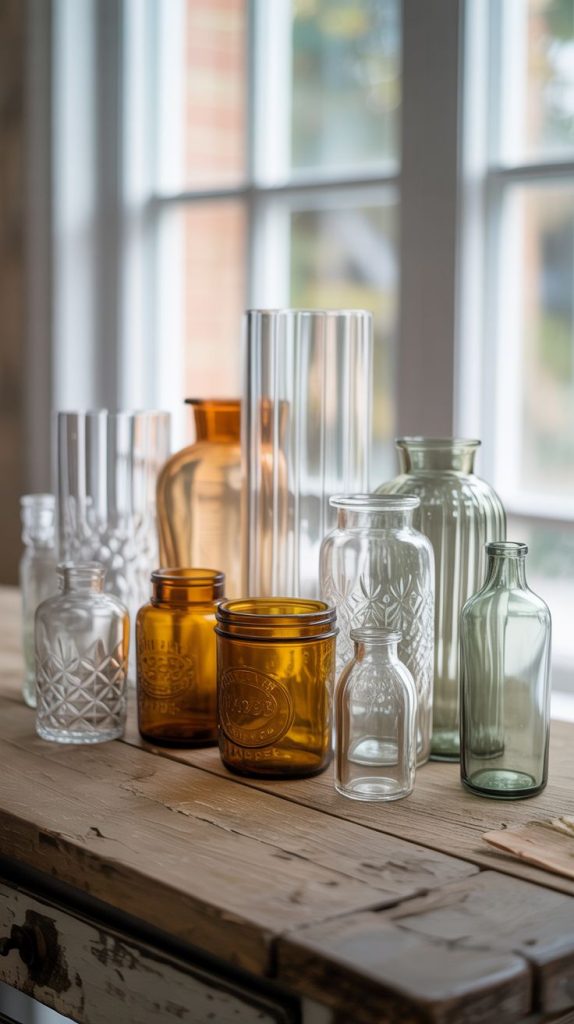
Your guests need something to arrange their flowers in, and offering variety makes it more fun. Small bud vases, medium cylinder vases, vintage bottles, and mason jars all work beautifully. I like to set out 10-15 vases for a party of 20-30 people, so there’s plenty of choice without overwhelming the table.
Clear glass is always a safe bet because it works with any flower combination, but don’t be afraid to throw in some colored glass or unique shapes. Vintage milk bottles or apothecary jars add character.
How to Style It:
- Arrange vases in a long line down one side of the table for easy access.
- Include a mix of heights and shapes so guests can choose what speaks to them.
- Pre-fill each vase with about two inches of water to save time.
- Tie a small ribbon or twine around a few vases for extra charm.
Add Greenery and Filler Stems for Texture
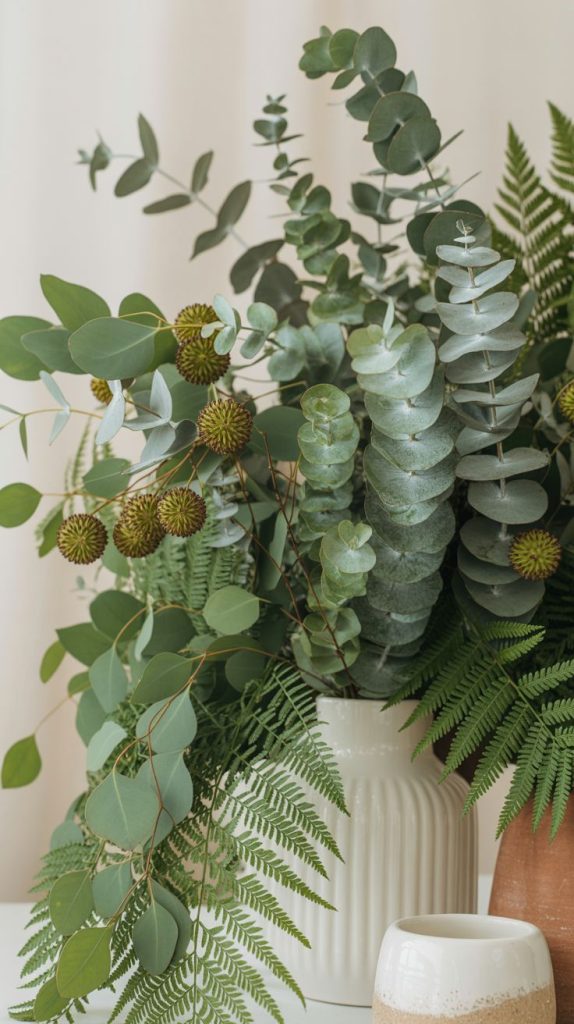
Greenery is the secret weapon that makes flower arrangements look professional instead of amateur. Eucalyptus, seeded eucalyptus, olive branches, and ferns all add incredible texture and help fill out bouquets. They also make flowers stretch further, which is great for your budget.
I always make sure to have at least as much greenery as I have flowers. It gives guests something to work with and prevents those sad, sparse bouquets that look like they’re trying too hard.
How to Style It:
- Display greenery in separate containers from the flowers for easy grabbing.
- Include at least two types with different leaf shapes and textures.
- Strip the lower leaves from stems before displaying to keep water clean.
- Place greenery at both ends of the table so guests can access it from either side.
Create a Tool Station with Scissors and Ribbon
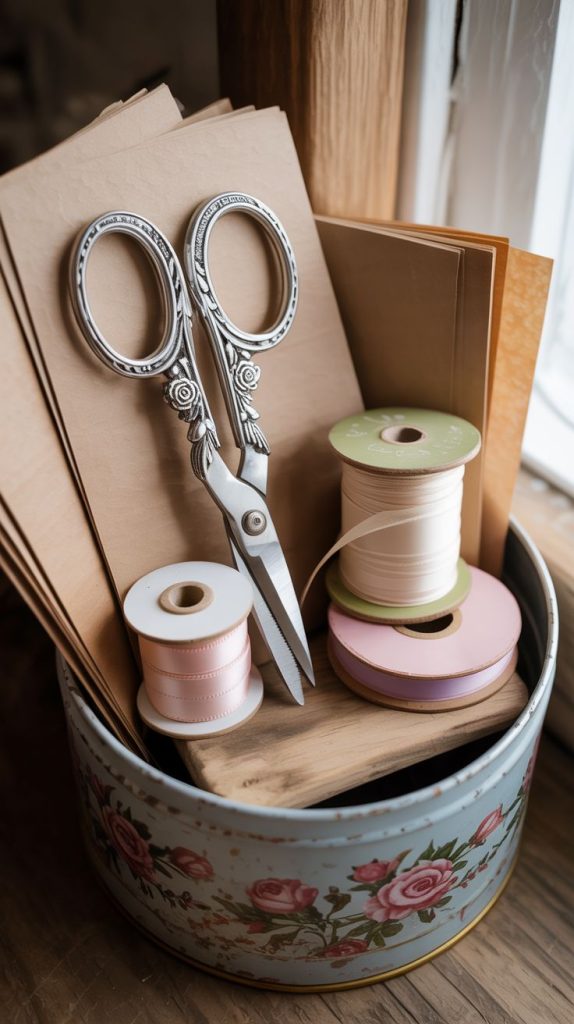
A well-organized tool station makes the whole bloom bar experience smooth and enjoyable. Sharp floral shears or scissors are absolutely necessary because dull scissors crush stems and make arranging frustrating. I usually set out 3-4 pairs so people aren’t waiting around.
Ribbon, twine, or raffia gives guests the option to tie off their arrangements for transport. It’s a small detail that makes their bouquets feel gift-ready.
How to Style It:
- Place scissors in a vintage tin or small basket so they don’t get lost.
- Offer ribbon in 2-3 colors that complement your flower palette.
- Add a small cutting board or wooden block as a designated cutting surface.
- Include a small trash bin nearby for stem clippings and leaves.
Set Out a Sign with Simple Instructions
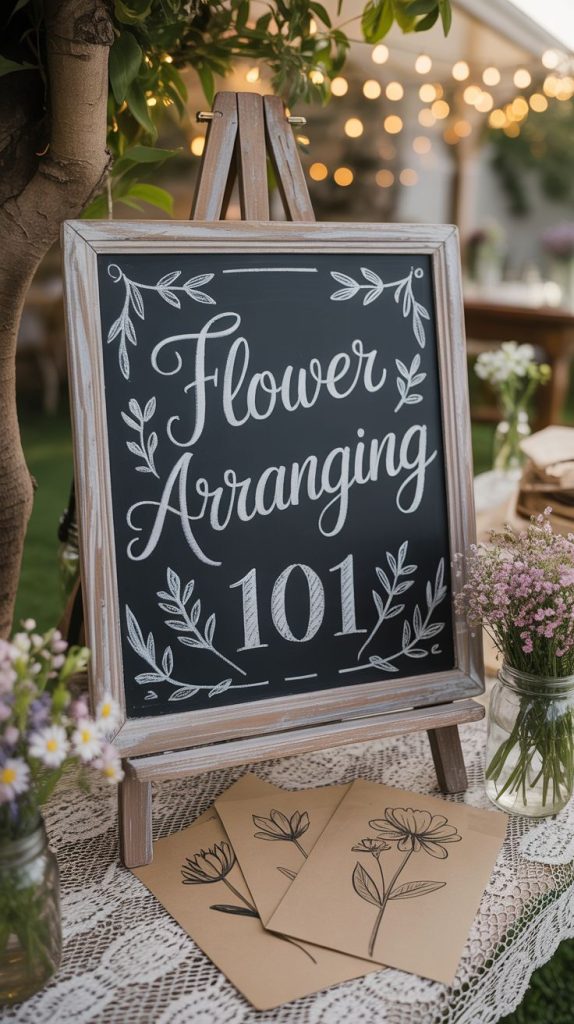
Not everyone is confident with flower arranging, and a simple instructional sign puts guests at ease. You don’t need anything complicated. A charming hand-lettered chalkboard or printed sign with basic steps works perfectly.
Keep it friendly and encouraging. Something like “Create Your Own Bouquet: Pick your vase, add greenery, choose 5-7 stems, trim and arrange!” takes the guesswork out of it.
How to Style It:
- Lean the sign against the wall or prop it on a small easel at eye level.
- Use simple, clear language that feels welcoming rather than bossy.
- Include a sweet message like “Take home a little bloom as our thank you!”
- Hand-letter it on kraft paper for a rustic, personal touch.
Include a Water Station for Easy Refills
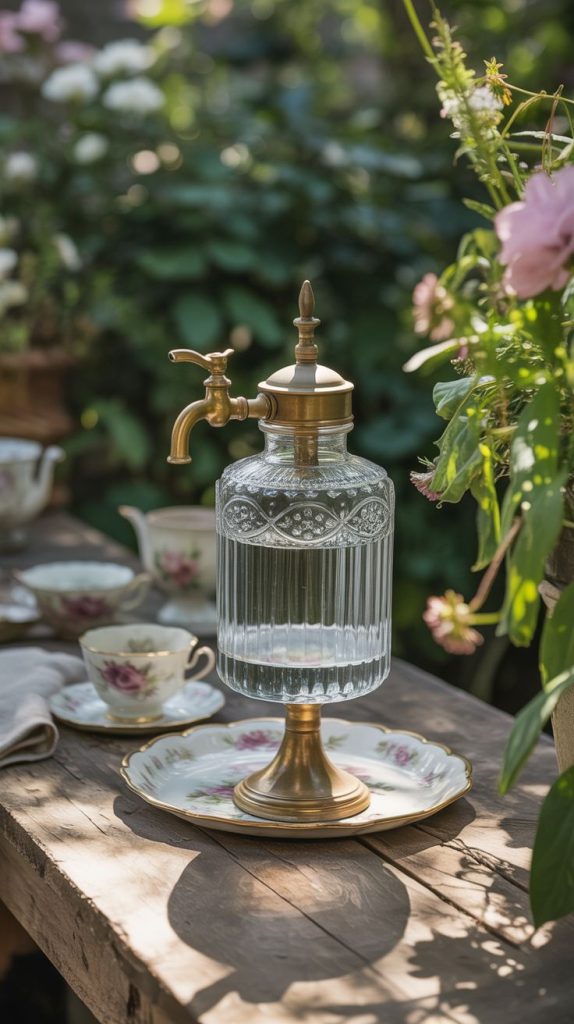
Fresh water is essential for keeping flowers happy, and having a dedicated water station saves you from running back and forth to the kitchen. A large drink dispenser, vintage water crock, or even a pretty pitcher with a small bucket underneath for drips works wonderfully.
This also helps guests top off their vases before they start arranging, which is something people often forget to do.
How to Style It:
- Position the water station at one end of the bloom bar table.
- Use a dispenser with a spout for easy pouring without spills.
- Add a small sign that says “Fresh Water” so it’s obvious.
- Place a pretty tray underneath to catch any drips and protect your table.
Add Ambient Lighting for Evening Gatherings
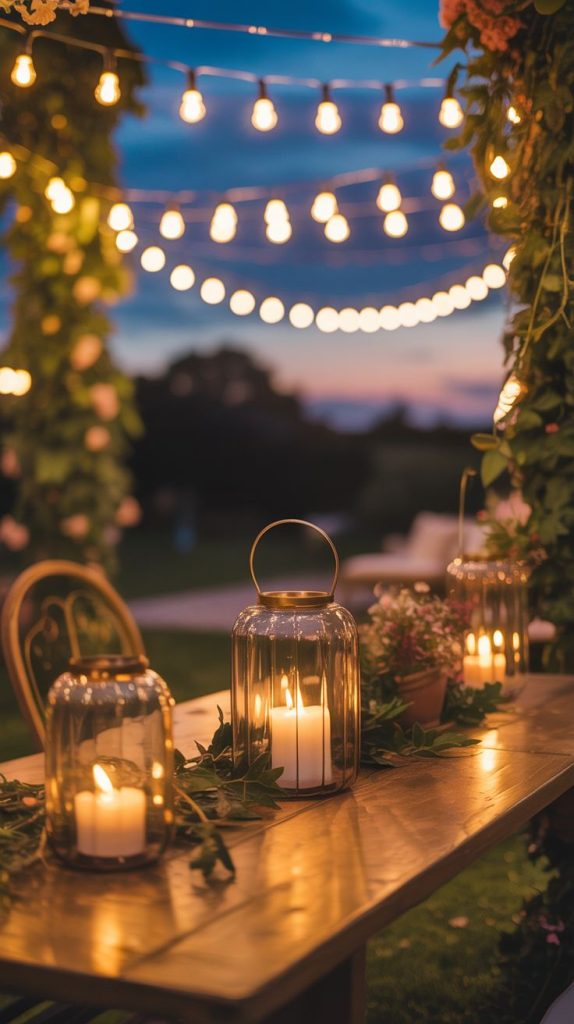
If your bloom bar party extends into the evening, lighting transforms the whole atmosphere. String lights overhead create a magical canopy effect, while lanterns or votives on the table add warmth and glow. The soft light makes everything feel more intimate and special.
Solar-powered string lights are perfect for backyards because you don’t have to worry about outlets or extension cords. They charge during the day and automatically turn on at dusk.
How to Style It:
- Drape string lights in a zigzag pattern above the bloom bar table.
- Place 4-5 lanterns with pillar candles along the table edge.
- Use warm white bulbs rather than cool white for a softer, more flattering glow.
- Hang a few lights in nearby trees to extend the ambiance beyond the table.
Offer Take-Home Wrapping Supplies
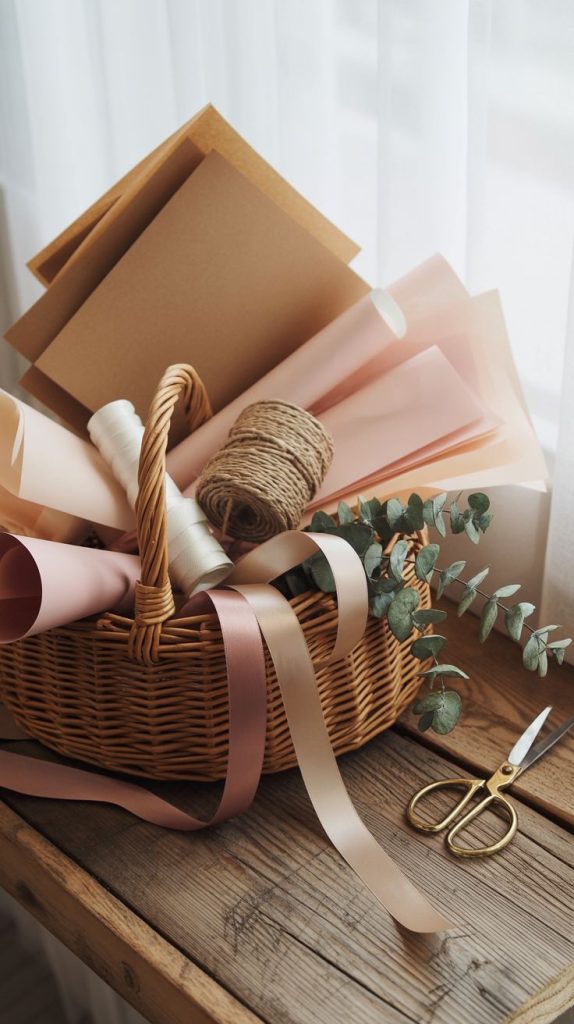
One of the sweetest touches you can add to your bloom bar is a little wrapping station. Brown kraft paper, tissue paper, or even newspaper gives guests a way to protect their arrangements for the trip home. It also makes their bouquets feel like a real gift.
Twine, ribbon, or raffia turns the whole thing into a beautifully wrapped package. Your guests will feel so special walking out with something they made and wrapped themselves.
How to Style It:
- Stack wrapping paper in a basket or wooden crate near the end of the table.
- Pre-cut paper into squares so guests can just grab and wrap.
- Offer 2-3 ribbon options in colors that match your flower palette.
- Add a small tag or sticker guests can write their name on if they want.
Style the Surrounding Area with Cozy Seating
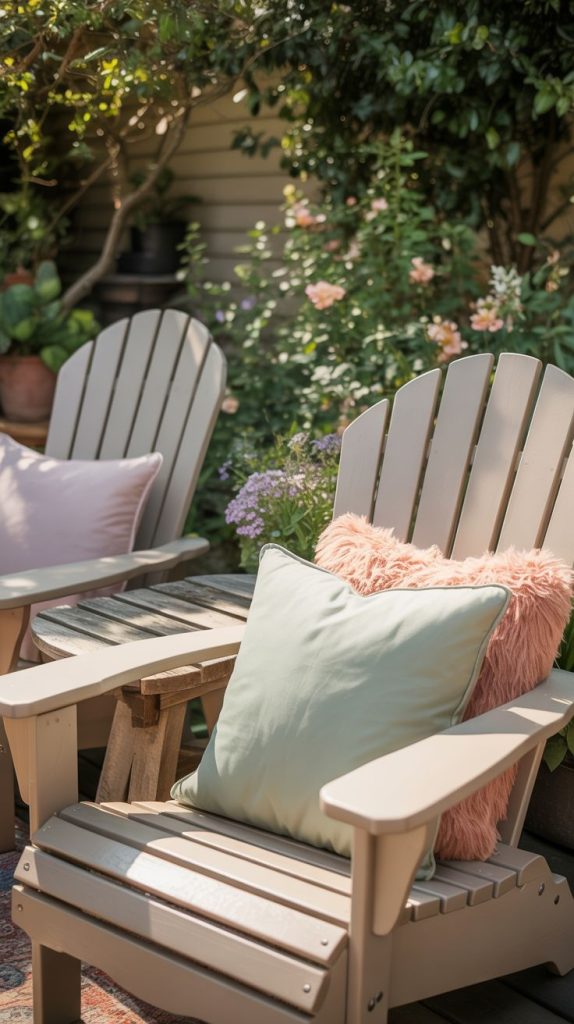
The bloom bar itself is the main attraction, but the area around it sets the mood for your whole gathering. Cozy seating nearby encourages guests to hang out, chat, and admire each other’s creations. Adirondack chairs, a vintage bench, or even picnic blankets with throw pillows all work beautifully.
You want people to feel like they can linger and enjoy the experience rather than rushing through it.
How to Style It:
- Arrange seating in a loose semicircle facing the bloom bar.
- Add outdoor cushions in soft pastels or neutrals for comfort.
- Place a small side table nearby for guests to set down drinks.
- Scatter a few potted plants or lanterns around the seating area for ambiance.
Incorporate Personal Touches and Signage
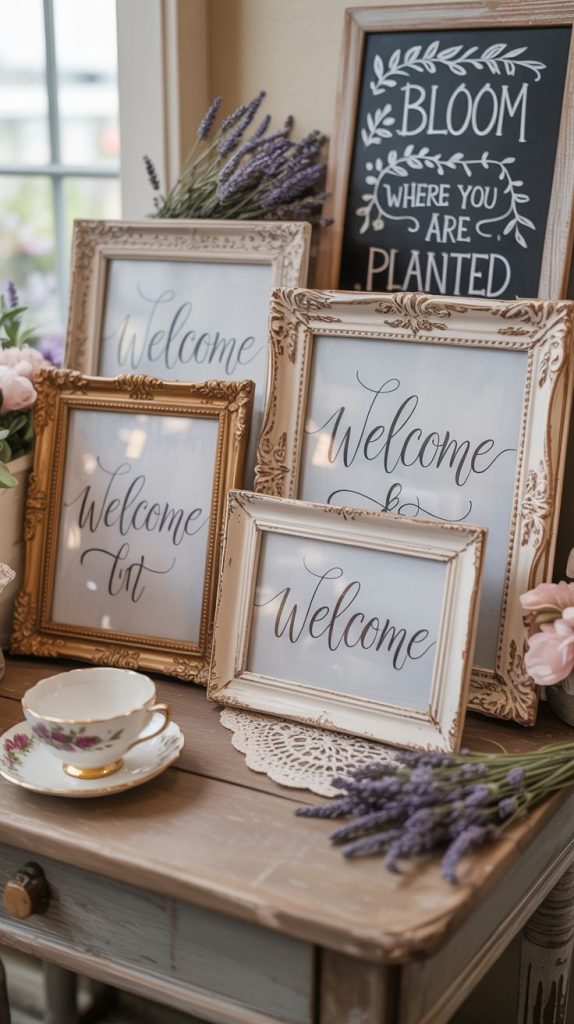
Personal touches make your bloom bar feel uniquely yours and show guests you put thought into the experience. A welcome sign, a menu of flower names, or even a little note about why you love hosting bloom bars adds warmth and personality.
Hand-lettered signs, vintage frames with printed quotes, or a chalkboard with a sweet message all work beautifully. These details don’t have to be fancy, but they do make the whole setup feel more intentional.
How to Style It:
- Create a small welcome sign with a message like “Bloom and Grow” or “Gather and Create.”
- Use a vintage frame to display the names of flowers available at the bar.
- Add a handwritten note thanking guests for coming.
- Incorporate a favorite quote about flowers or friendship on a chalkboard.
Frequently Asked Questions
How many flowers do I need for a bloom bar?
Plan for about 5-7 stems per guest, plus extra greenery. For 20 guests, that’s roughly 100-140 flower stems and 60-80 greenery stems. It sounds like a lot, but you want abundance so guests don’t feel like they’re competing for the best blooms.
What’s the best time to set up a bloom bar?
Set up the morning of your event, ideally 2-3 hours before guests arrive. This gives flowers time to hydrate but prevents them from wilting in the heat. Keep buckets in shade and top off water right before the party starts.
Can I use grocery store flowers for a bloom bar?
Absolutely! Grocery store flowers work beautifully and keep costs down. Trader Joe’s, Whole Foods, and even Costco have great selections. Buy flowers 1-2 days ahead so they have time to open up.
How do I keep flowers fresh during the party?
Keep everything in the shade, change water in buckets every few hours, and mist flowers lightly if it’s hot. Remove any leaves that fall below the waterline to prevent bacteria buildup. Fresh water makes the biggest difference.
What if guests don’t know how to arrange flowers?
That’s totally normal! Put out a simple instruction sign and consider doing a quick demo at the start. Most people will relax once they see how forgiving flower arranging really is. There’s no wrong way to do it.
Do I need floral foam for a bloom bar?
Not at all. Floral foam is messy and unnecessary for casual arrangements. Guests can create beautiful bouquets using just water and their chosen vase. Keep it simple and stress-free.
How far in advance can I buy flowers?
Buy hardy flowers like carnations, mums, and alstroemeria 3-4 days ahead. More delicate blooms like roses, peonies, and ranunculus should be purchased 1-2 days before. Store them in a cool spot with fresh water.
What should I do with leftover flowers?
Send extras home with guests, create arrangements for your own home, or donate them to a local nursing home or hospital. Flowers spread joy, so share the abundance!
